
Custom Roles
This page explains how to create custom Roles and Access Policies within Secberus.
Roles overview
Roles are a collection of access policies that include a set of permissions. There are predefined roles that can be assigned to users within each organization. In addition, custom roles can be created to limit a users access and privileges for specific data sources. Each user can be assigned multiple roles within each organization.
Creating custom roles
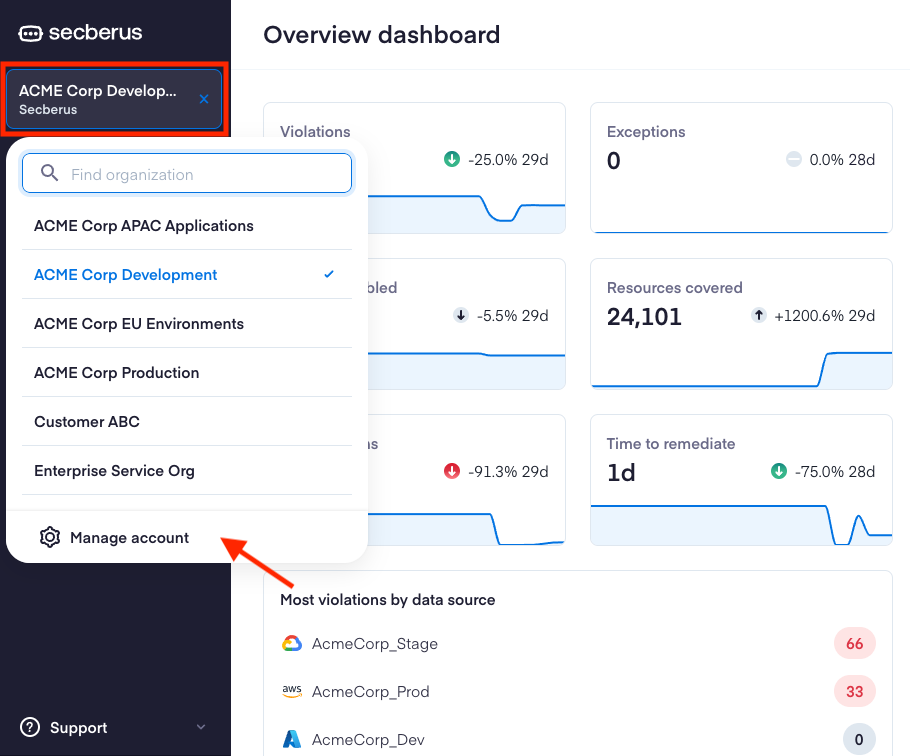
To create a custom role, first navigate to the Secberus Admin by clicking on the Organization select menu followed by Manage account.
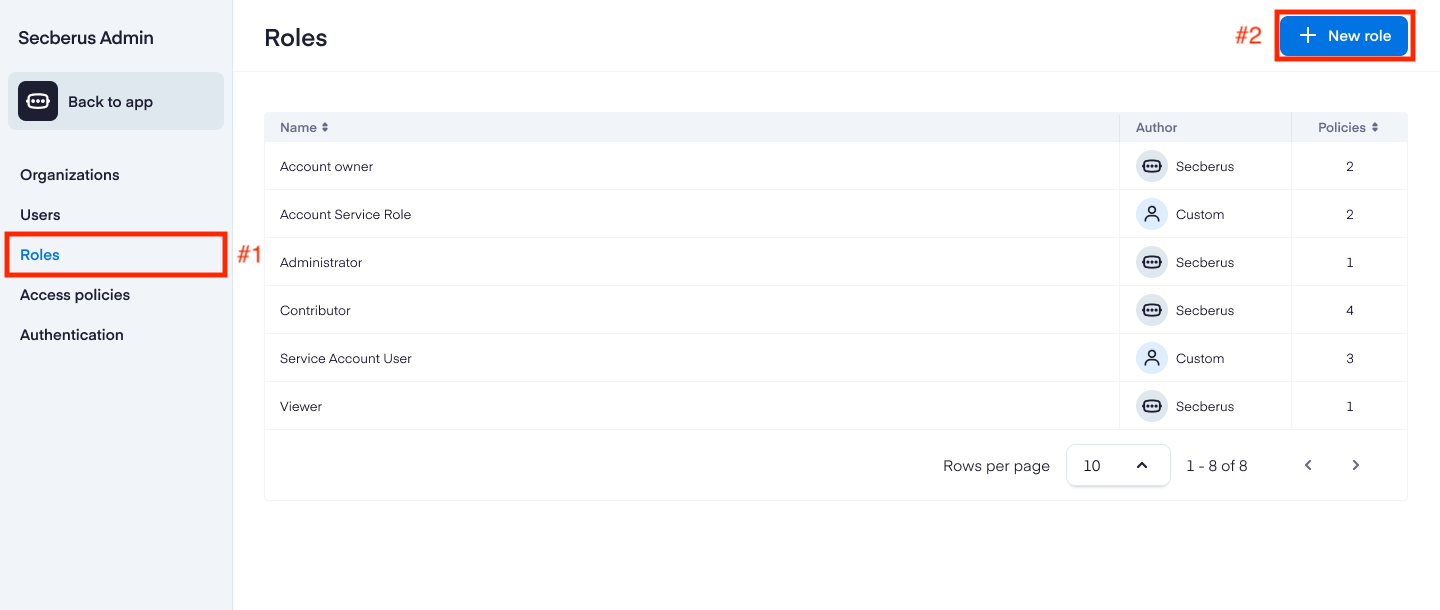
Navigate to Roles.
Click + New role to bring up the setup screen.
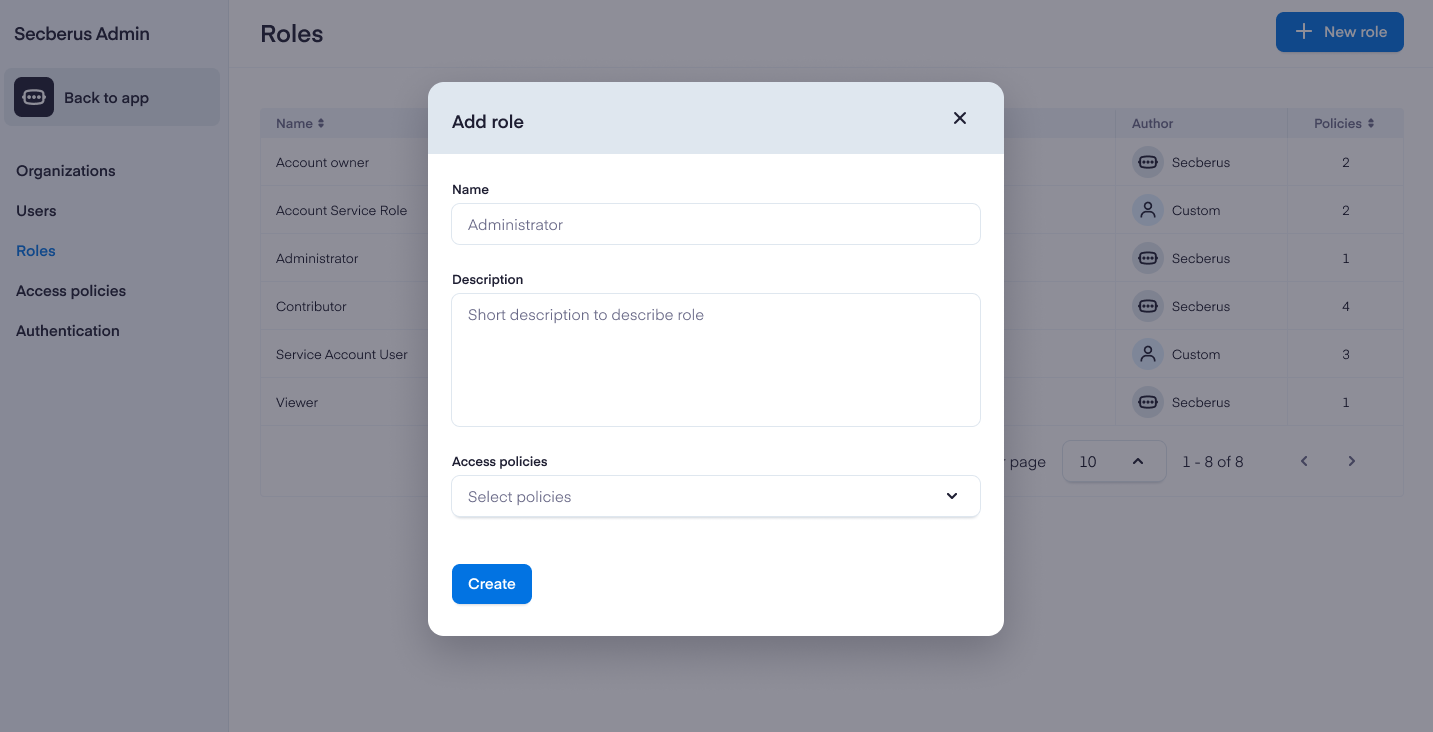
Include the Name of the role, a short Description, and then select one or more Access policies that define the privileges for the role. See Creating access policies for more information.
Creating access policies
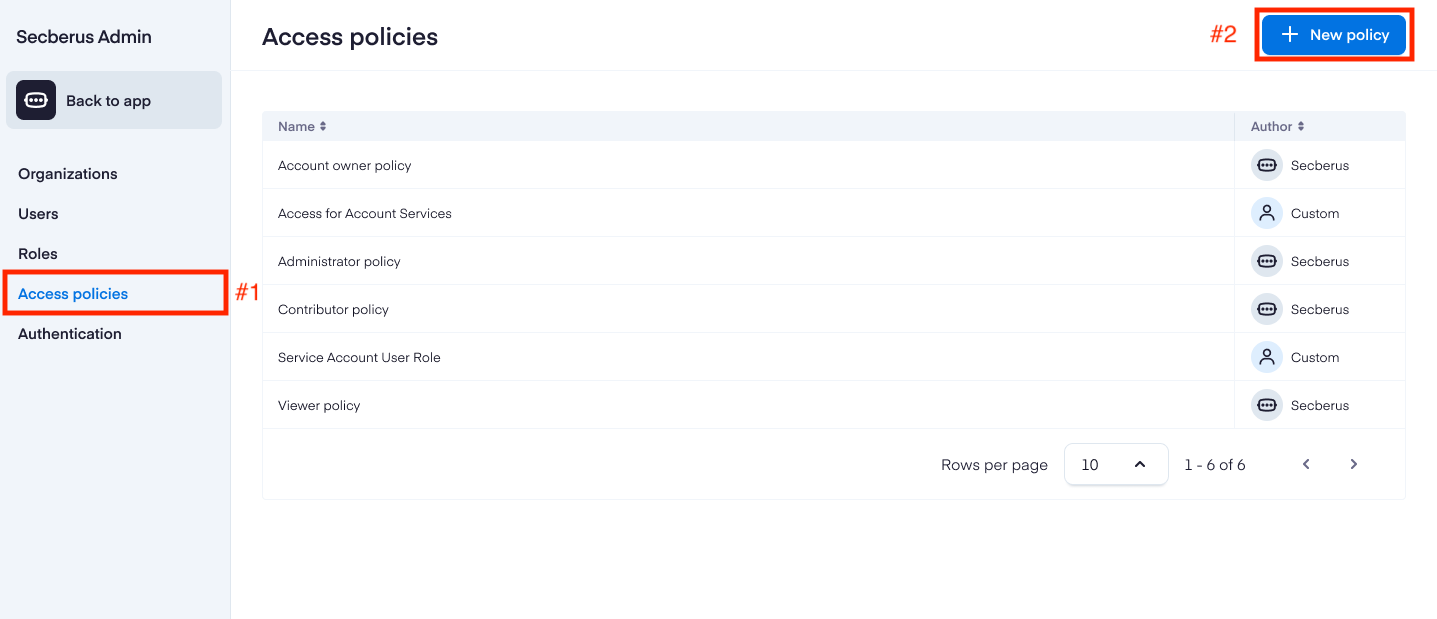
To create a new access policy, first navigate to the Secberus Admin section and select the Access policies item.
Click + New policy to bring up the Create a new access policy screen.
Include the Name of the policy and a short Description, then add the policy details in the Policy editor.
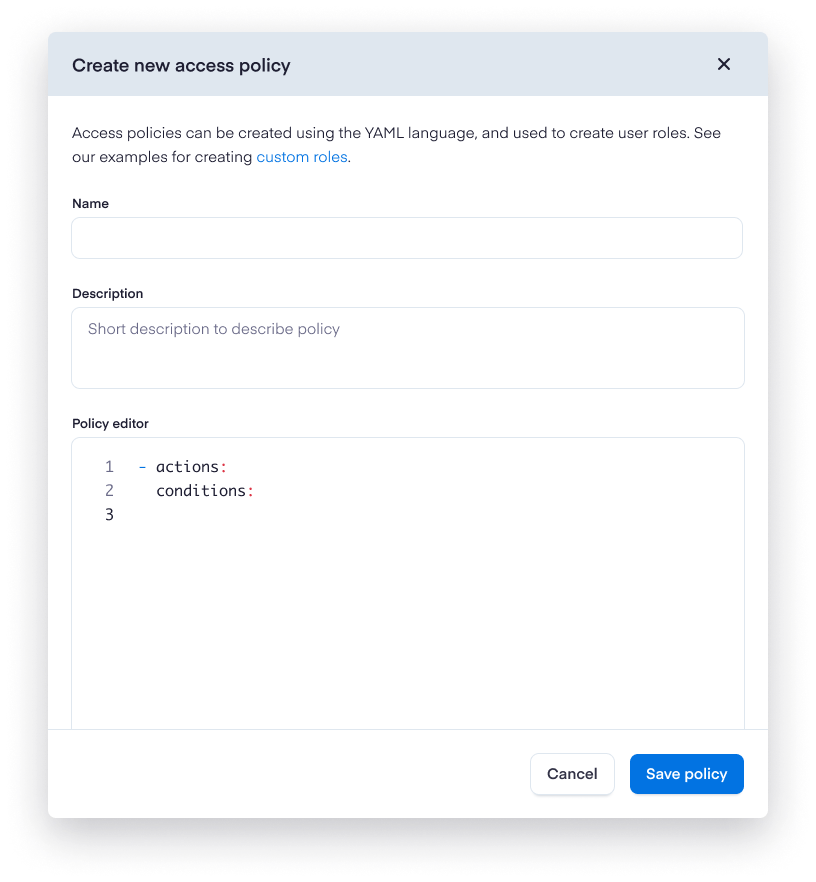
Custom access policies can be created using the YAML language. Policies will be composed of two sections: Actions and Conditions. Permissions are purely additive (there are no "deny" rules).
| Key | Value |
|---|---|
| Actions | API Permissions api:datasources:create |
| Conditions | Attributes
|
Example policies
Here is a simple access policy that allows full unrestricted access to a single datasource named "AWS-DS-01":
- actions:
    - api:datasources:create
    - api:datasources:read
    - api:datasources:update
    - api:datasources:delete
  conditions:
    - field: datasource.name
      value: AWS-DS-01
      comparator: match
For more complex policies, utilize multiple actions and conditions blocks:
- actions:
    - api:datasources:create
    - api:datasources:read
    - api:datasources:update
    - api:datasources:delete
  conditions:
    - field: datasource.name
      value: AWS-DS-01
      comparator: match
- actions:
    - api:exceptions:read
  conditions:
    - field: exception.name
      value: AWS-DS-01-exception
      comparator: match
- ... more ...
The value block can be constructed with multiple items. Here is a policy that allows read permissions for datasources "AWS-DS-02" and "AWS-DS-03" only for users who are in a customer SSO defined group "customer-group-1":
- actions:
    - api:datasources:read
  conditions:
    - comparator: oneof
      field: datasource.name
      value:
        - AWS-DS-02
        - AWS-DS-03
    - comparator: match
      field: user.group
      value: customer-group-1
Each logic block that contains conditions can only make reference to a service type, i.e. only datasources type:
# WRONG/INVALID
- actions:
    - api:datasources:read
    - api:exceptions:read
  conditions:
    - field: datasource.name
      value: AWS-DS-01
      comparator: match

# VALID
- actions:
    - api:datasources:read
  conditions:
    - field: datasource.name
      value: AWS-DS-01
      comparator: match
- actions:
    - api:exceptions:read
  conditions: []
Logic blocks with multiple service types are valid as long as there aren't any conditions associated with them:
# VALID
- actions:
    - api:datasources:read
    - api:exceptions:read
  conditions: []
You cannot specify the same field multiple times in a single logic block:
# WRONG/INVALID
  conditions:
    - comparator: oneof
      field: datasource.name
      value:
        - AWS-DS-02
        - AWS-DS-03
    - comparator: equals
      field: datasource.name
      value: AWS-DS-04
Certain actions are not able to be restricted by condition. The actions "api:logs:read" and "rpc:queries:execute" will not respect any associated conditions.
For example, the following policies are functionally identical:
- actions:
    - "api:logs:read"
  conditions:
    - comparator: "match"
      field: "log.name"
      value: "*mylog*"
Will behave the exact same way as:
- actions:
    - "api:logs:read"
  conditions: []
Once you have written your policy, click Save to publish it. The policy will then be available to select from when creating and editing custom roles.
NoteYou can clone and edit any access policy. This is an easy way to tailor policies for your specific use cases. Navigate to any access policy, click on the more menu icon, and select Clone policy.
Updated about 1 year ago