
GCP Data Source
This page explains how to setup & onboard an GCP account as a data source.
GCP setup overview
Secberus is completely agentless and uses a read-only API permission to securely access your GCP metadata. In order to create a GCP data source in Secberus you will need administrator access to the Google Cloud console.
SETUP ORGANIZATIONS FIRSTSecberus uses "Organizations" to allow users to segment visibility, posture, teams, and actions within the platform.
It is important to setup your organizational structure first before onboarding cloud environments, as the data collected from a cloud environment is only visible in the Organization in which the data source was created.
Click here to Setup Organizations.
Connecting a GCP account
What to ExpectConnecting a GCP account takes about 10 minutes and requires administrative access to the cloud environment you wish to connect.
Create a Service Account specifically for Secberus
Choose a project to house the Secberus service account, or create a new one.
ImportantThe GCP project, in which the service account is created, must have the Cloud Resource Manager API enabled. You can ensure it is by visiting:
https://console.developers.google.com/apis/api/cloudresourcemanager.googleapis.com/overview
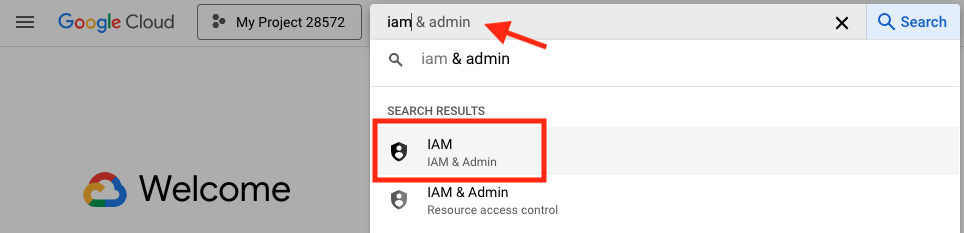
- From the GCP console, in the search bar, type IAM, and click on IAM & Admin..
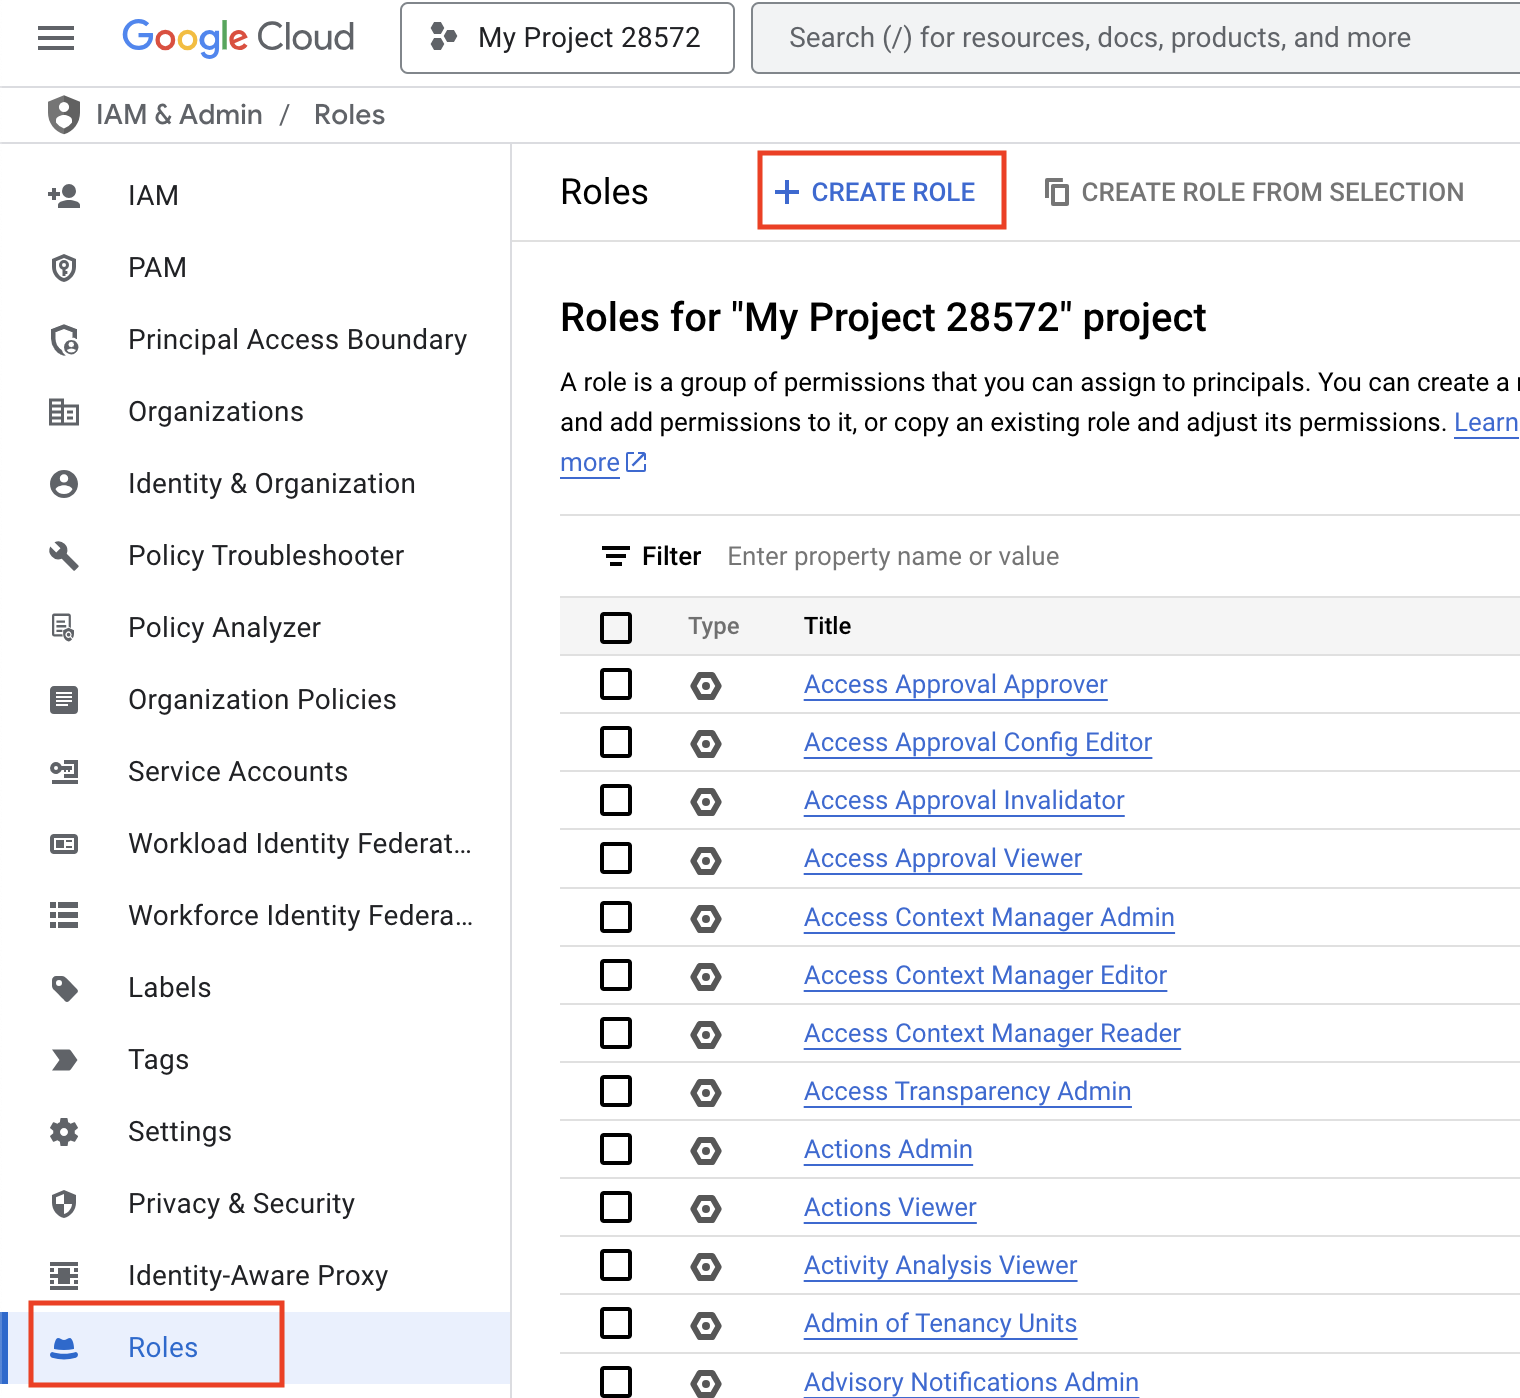
- From the left-hand navigation menu, click on Roles, then + CREATE ROLE.
- Give the role a meaningful name, click on + ADD PERMISSIONS.
- Search for and select
storage.buckets.getIamPolicy. Click ADD.
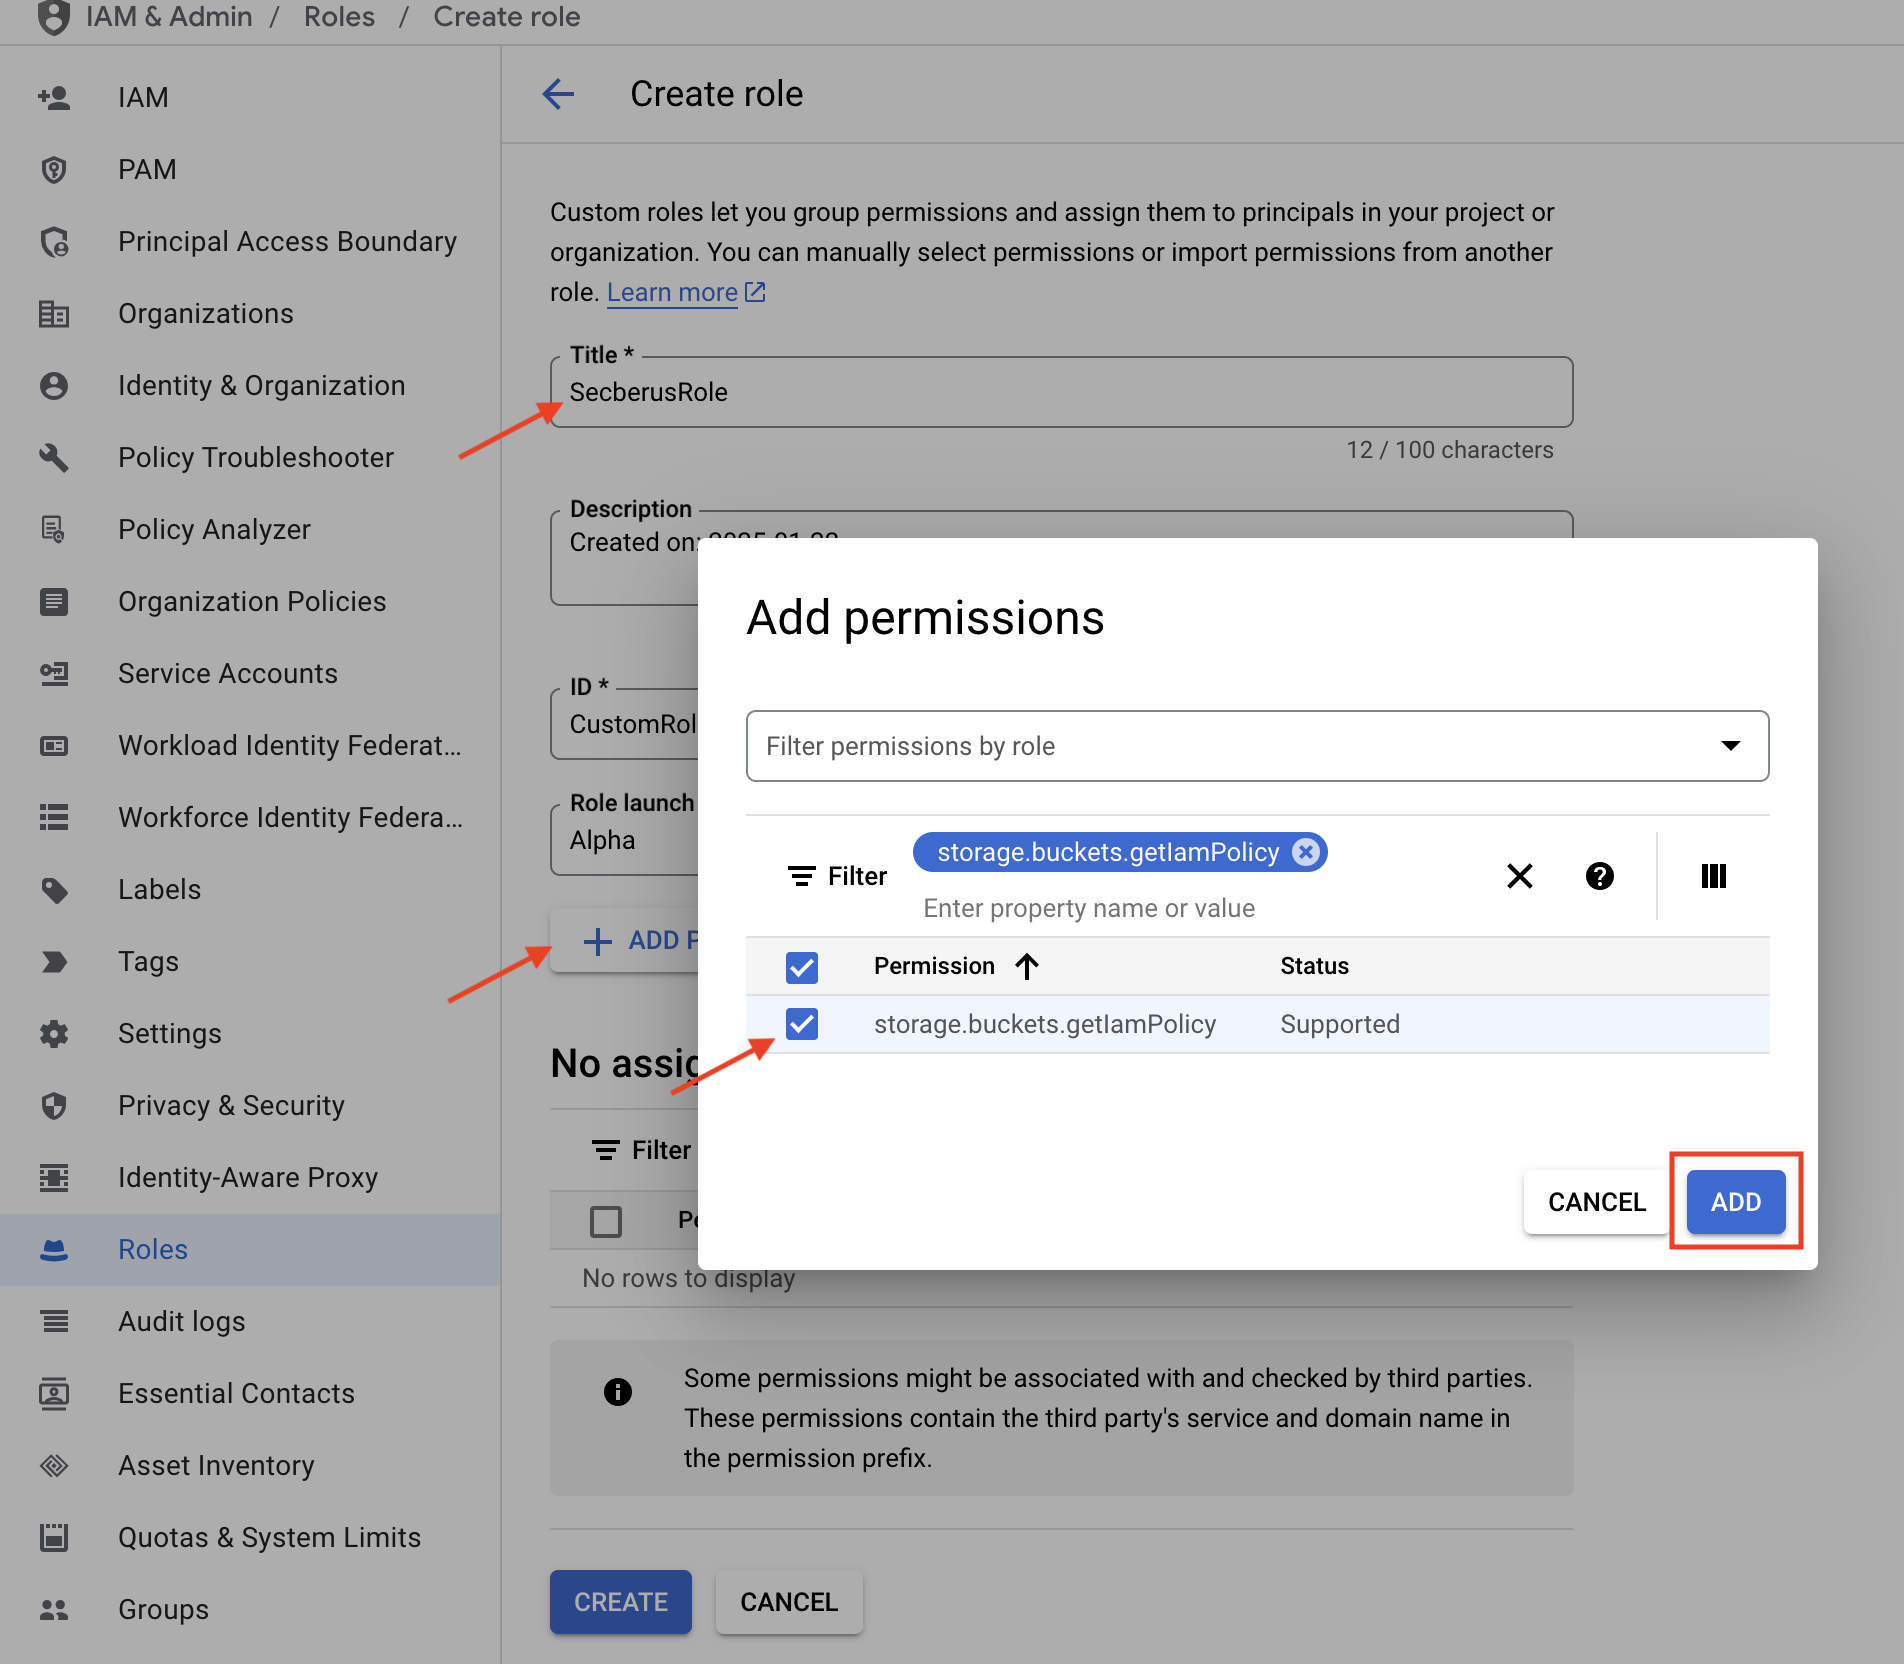
- Click on CREATE.
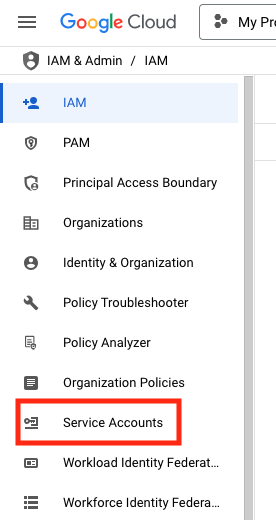
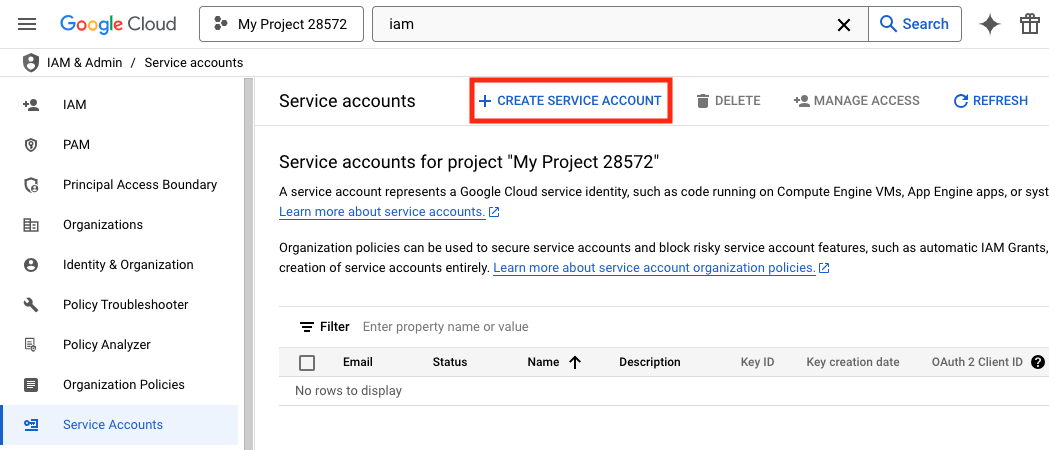
- From the left-hand navigation menu, click on Service Accounts.
- Select + CREATE SERVICE ACCOUNT.
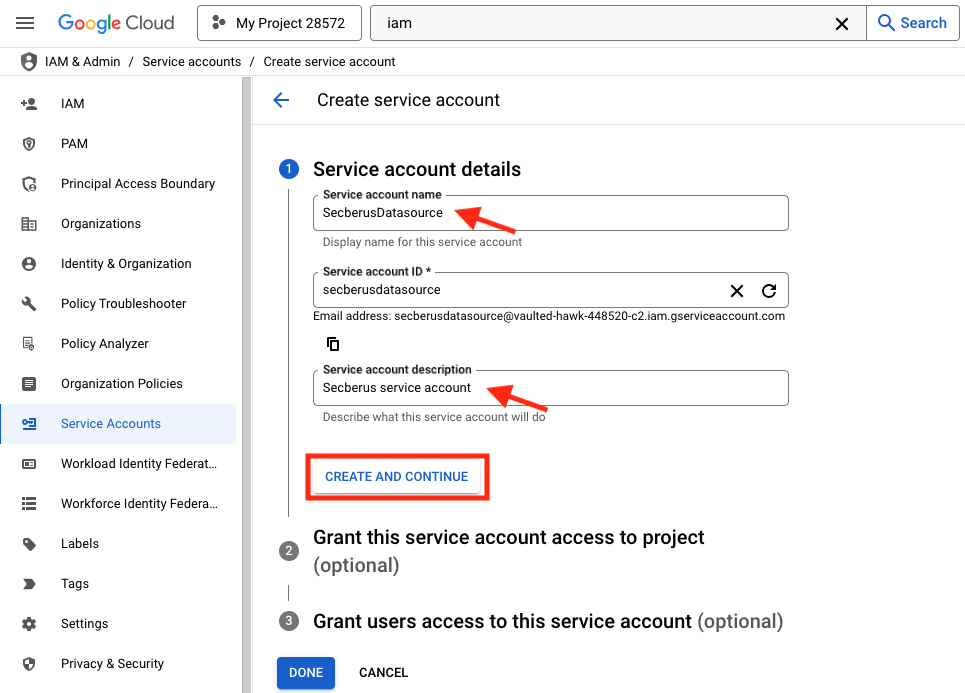
- Populate the Service account name and Service account description fields, then click CREATE AND CONTINUE.
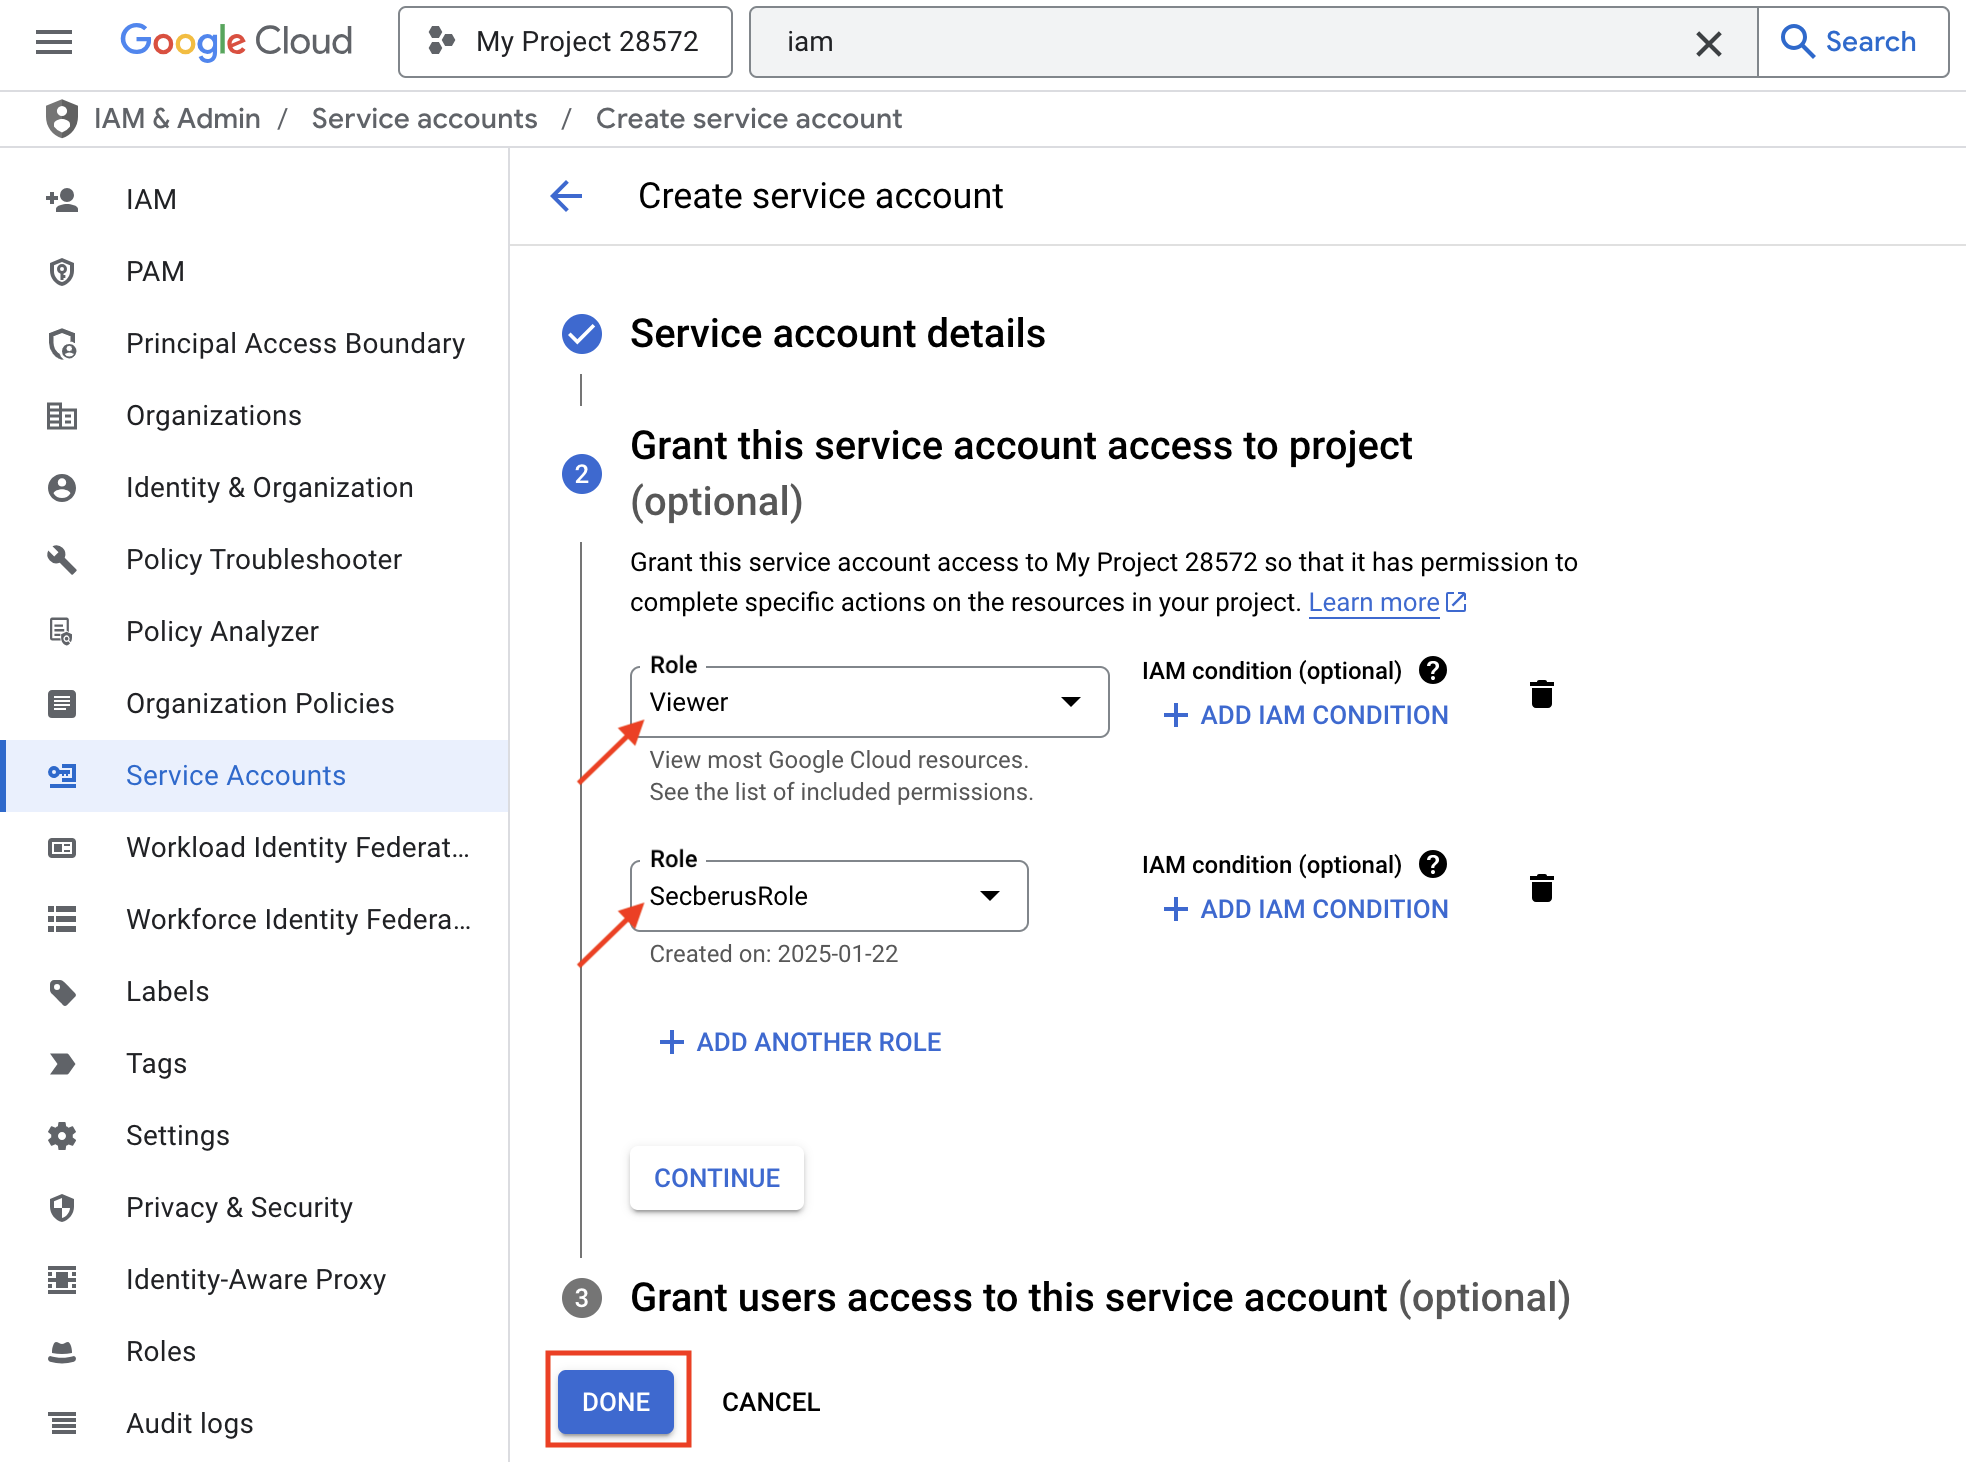
- Using the Role selector to select the Basic > Viewer role.
- Click + ADD ANOTHER ROLE and add the custom role you created in step 5.
- Click on DONE
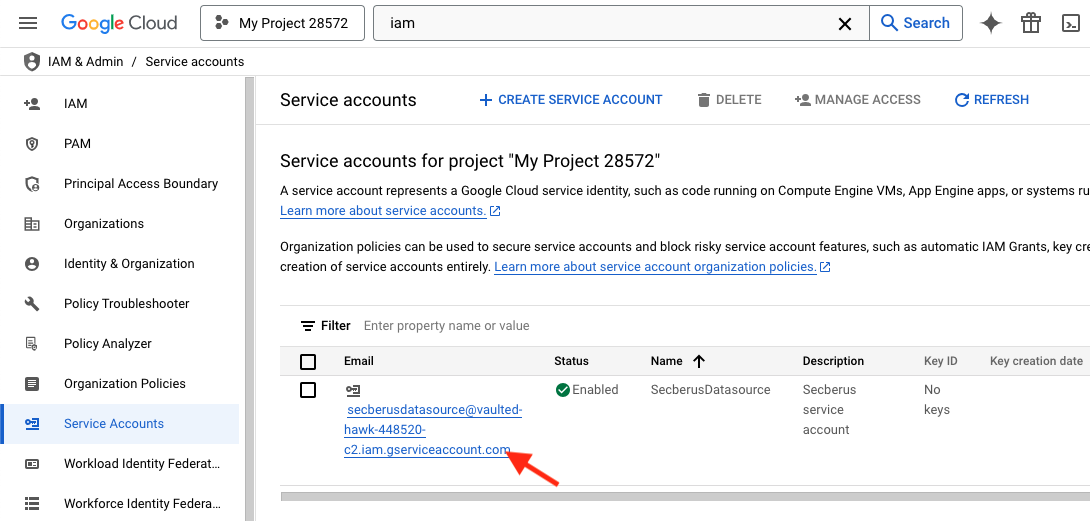
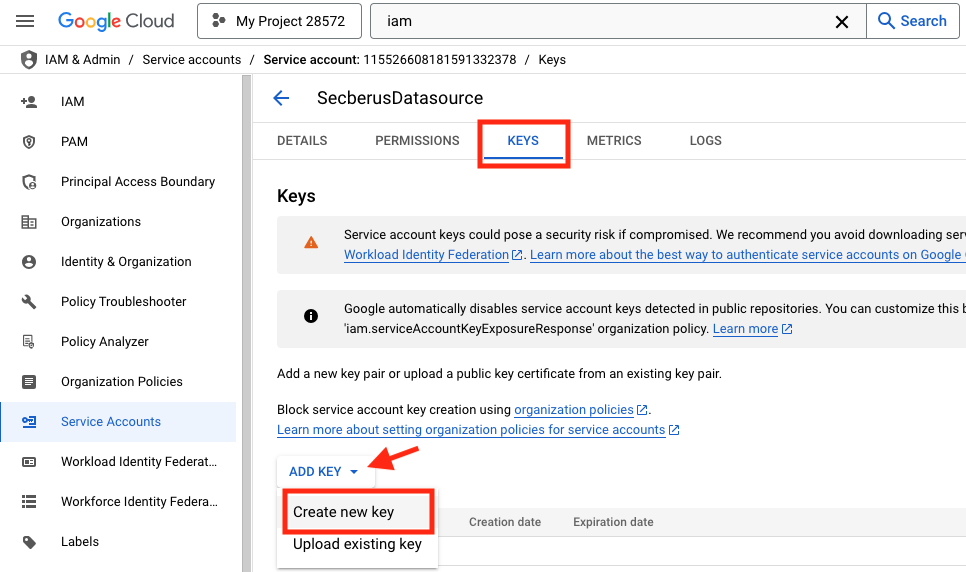
- Click on the newly created service account from the Service accounts screen.
- With the service account open, select the KEYS tab and use the ADD KEY menu to Create new key.
- In the Create private key window leave the Key type as JSON and click CREATE.
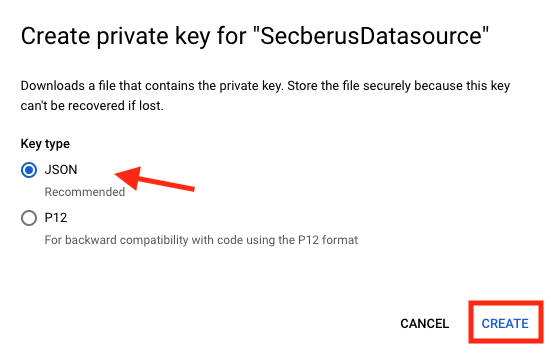
- The private key will be saved to your computer. Keep this file in a safe location. Secberus will need the credentials to connect to your project.
Multi-project setupIf you want Secberus to monitor multiple GCP projects, the service account you created must have a role/permission in each project that should be monitored. The service account can be added to each project individually, or the roles/permissions can be conferred via folder or organization settings.
Learn more about GCP service accounts here.
Secberus - Connect GCP Data Source
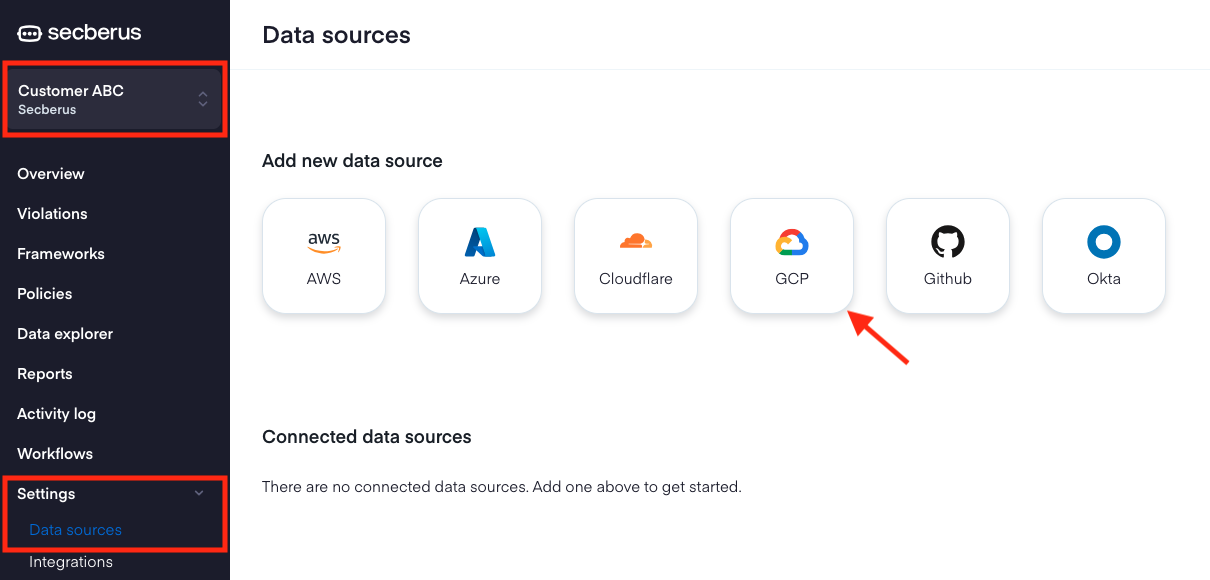
- Log into Secberus and select the org you want to create the data source connection in.
- Click on Settings and then click on Data sources.
- Choose the GCP data source type in the Add new data source section.
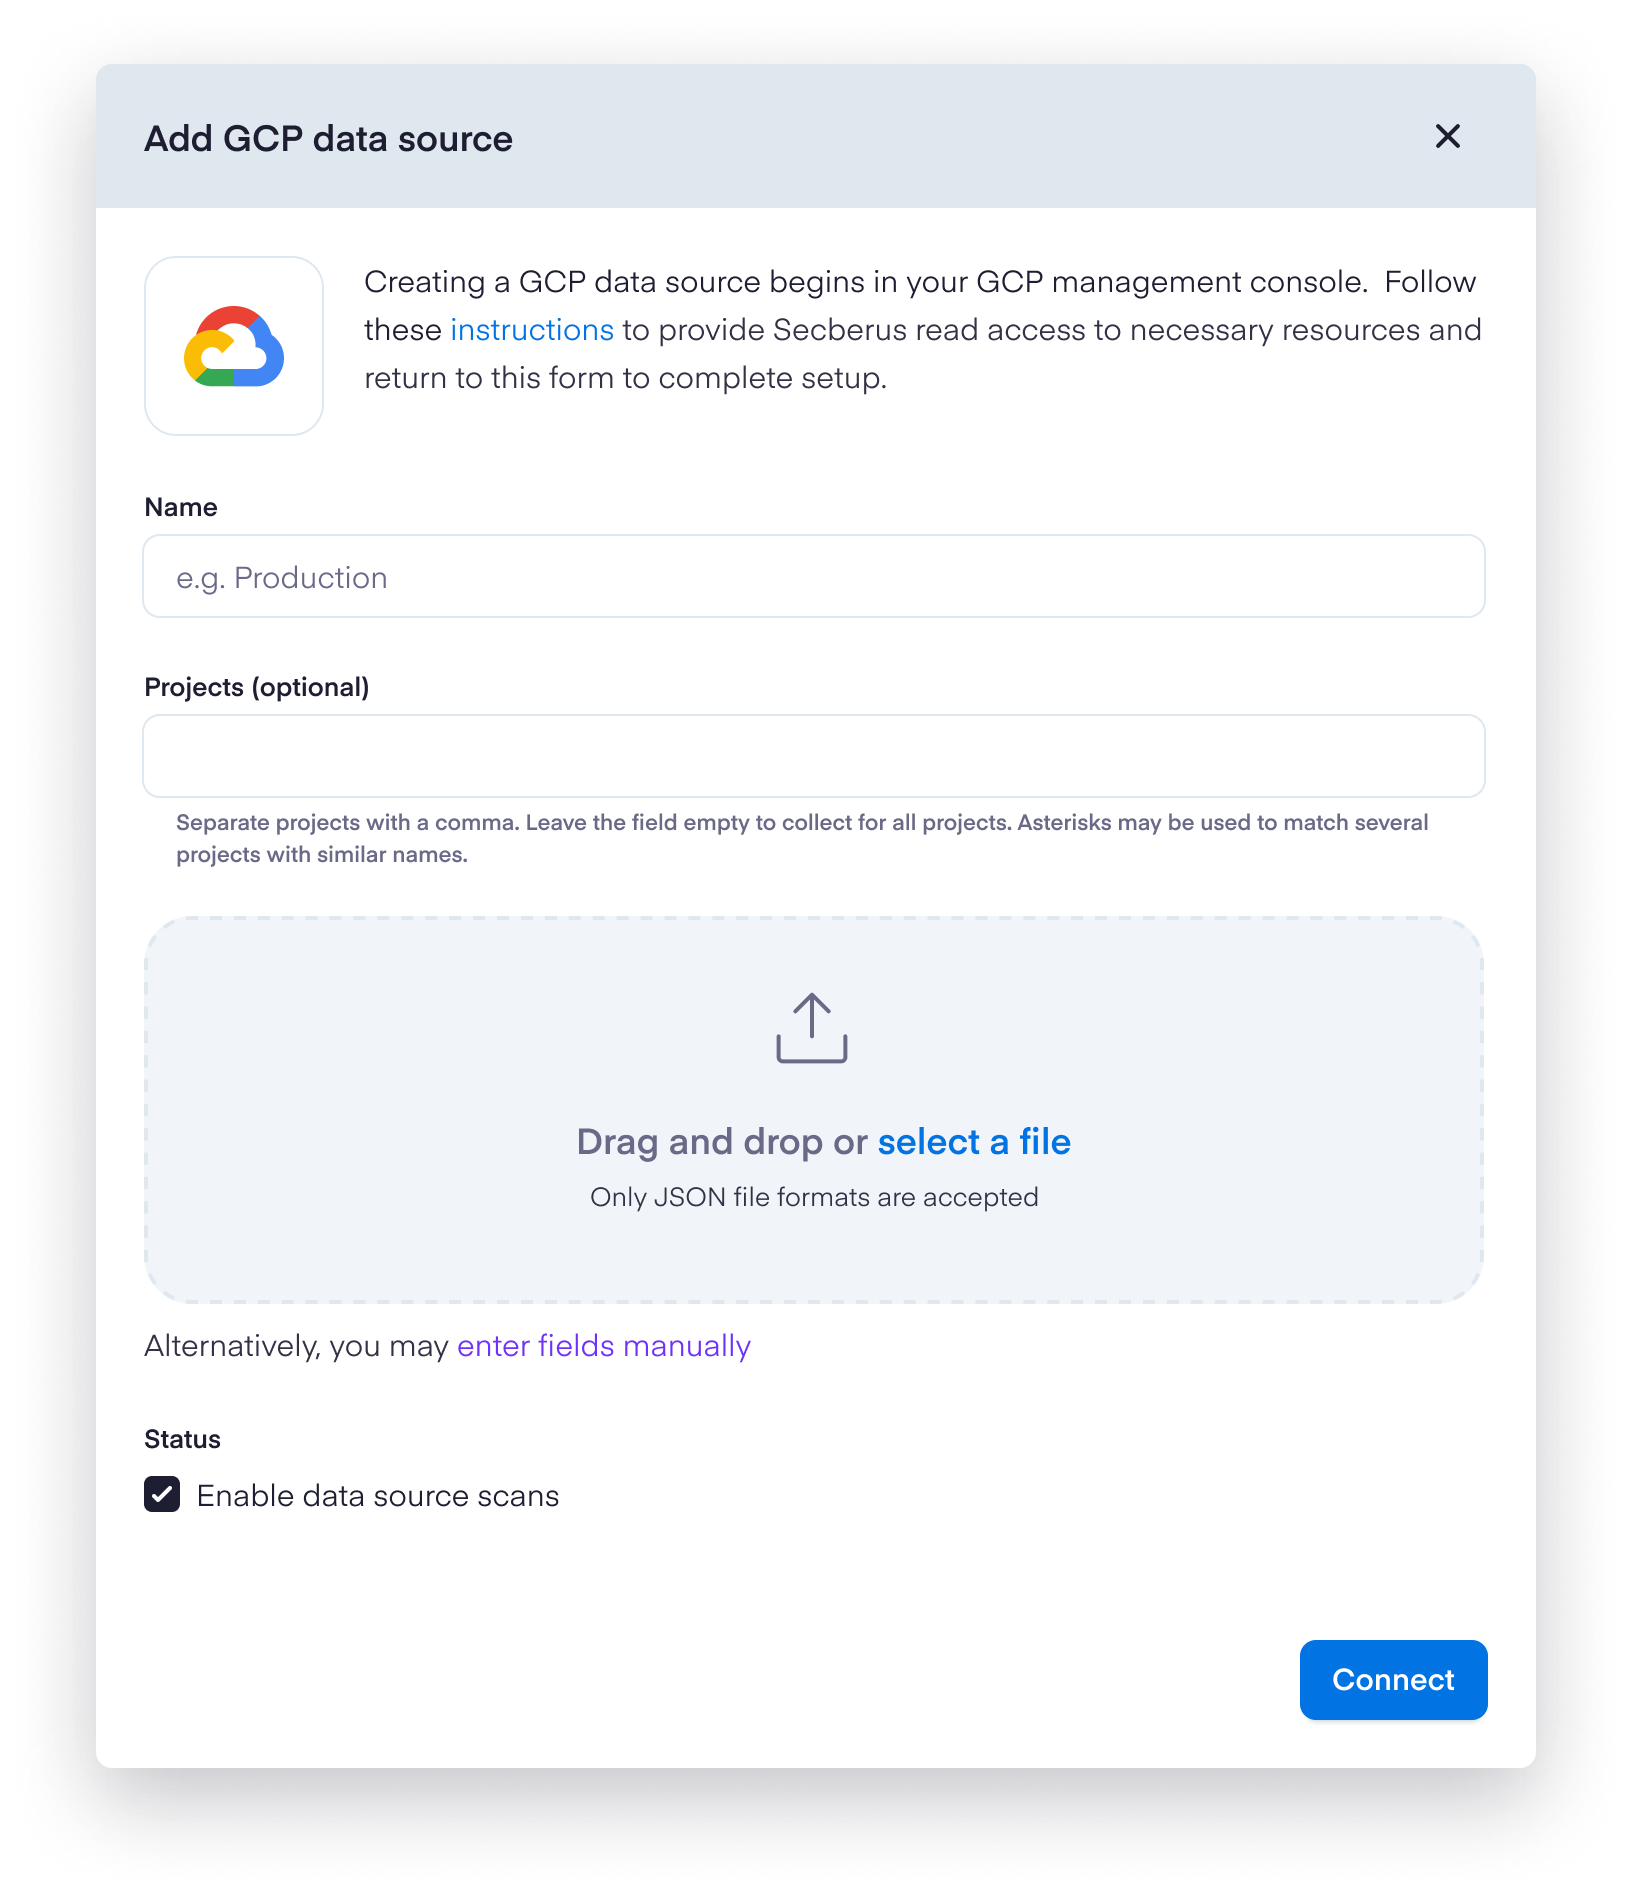
- Populate the Name field for the new data source.
- The Projects field is meant as a filter to limit the data that Secberus will collect. You can add a comma separated list of project names, as well as strings with asterisks as wildcard characters to match on a group of similarly named projects. For example,
my-project-1,production-*. Leave this field empty (the default) to allow Secberus to collect the data for all projects which the service account has access. - Drag and drop or select the credentials json file from step 15 and click Connect.
- Set the desired status for enabling data source scans.
CONGRATULATIONS 🎉You have successfully onboarded a data source for your Google Cloud Platform account. You can now add more GCP accounts, onboard other cloud provider accounts, or apply a policy to this GCP account. Additionally, you can view the connection status of each data source monitored once Secberus begins collection resource data for evaluation.
Updated about 1 year ago