
Azure Data Source
This page explains how to setup & onboard an Azure account as a data source.
Azure setup overview
Secberus is completely agentless and uses a read-only API permission to securely access your AWS metadata. In order to create a data source for an AWS account you will need administrative access to the Azure Portal
SETUP ORGANIZATIONS FIRSTSecberus uses "Organizations" to allow users to segment visibility, posture, teams, and actions within the platform.
Cloud environments only exist within Organizations, so it is important to make sure you setup your organizational structure first before onboarding cloud environments to those specific Organizations.
Click here to Setup Organizations.
Roles and permissions in Azure
1. Create a new app registration
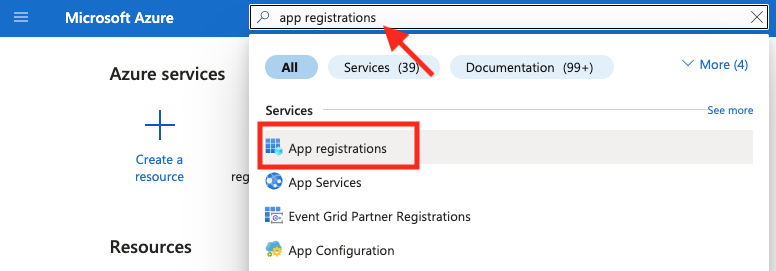
- Go to your Azure Portal and navigate to App registrations using the Search bar.
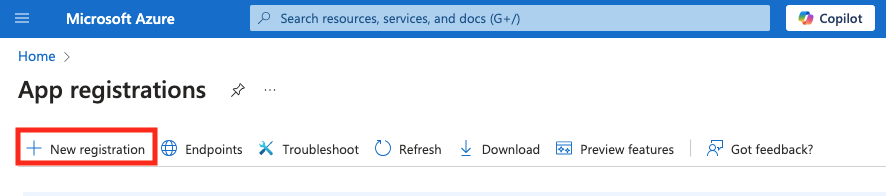
- From App registrations select + New registration.
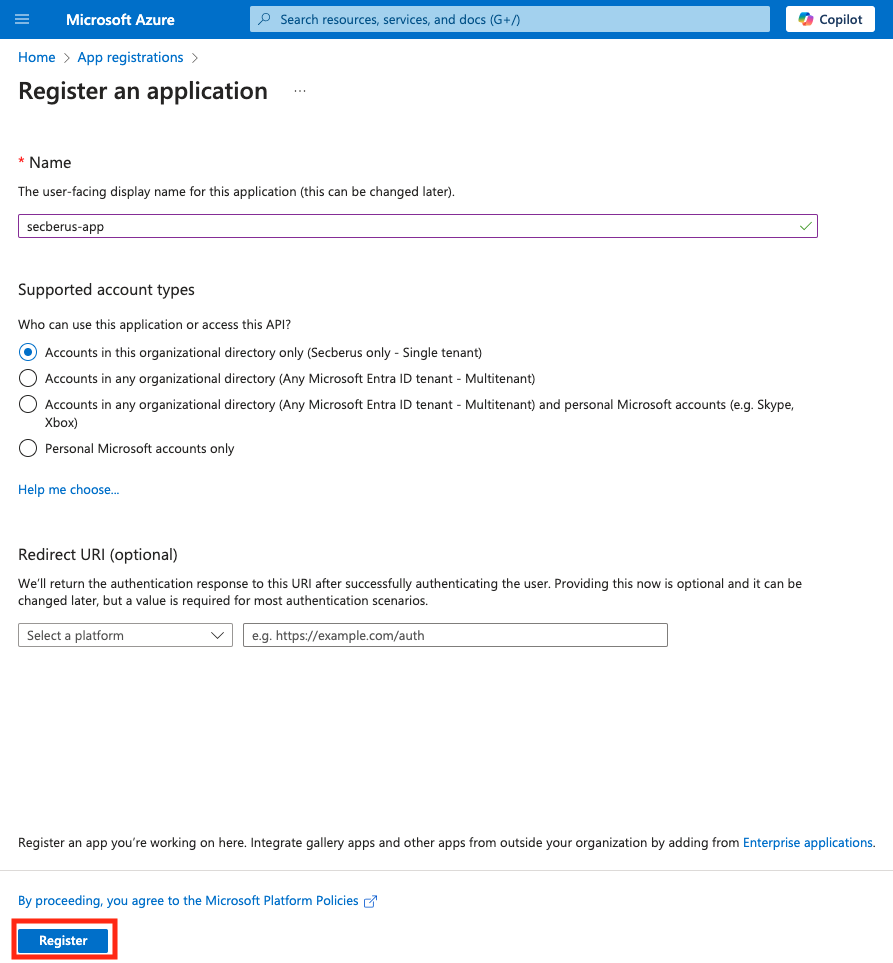
- From the Register an application page use the Name field to name the application. The name should signify the app is authorizing Secberus platform (e.g. 'secberus-app'). Leave the rest of the page unchanged and click the Register button.
- Observe that the new registration is created.
2. Create a custom role
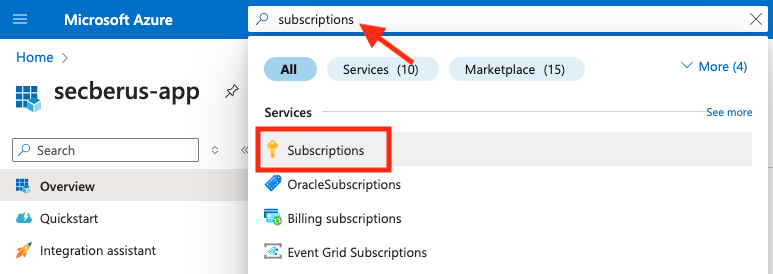
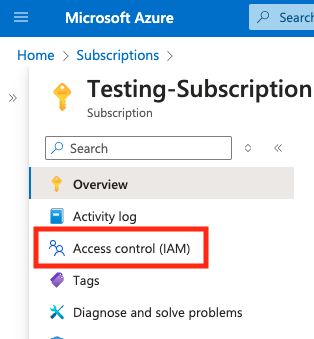
- Navigate to the Subscriptions page using the Search bar.
- Click on the subscription you want to authorize Secberus to connect to from the Subscriptions page.
- In the left-hand navigation menu, click on Access Control (IAM) for the Subscription.
- Click the + Add dropdown button and click on Add custom role.

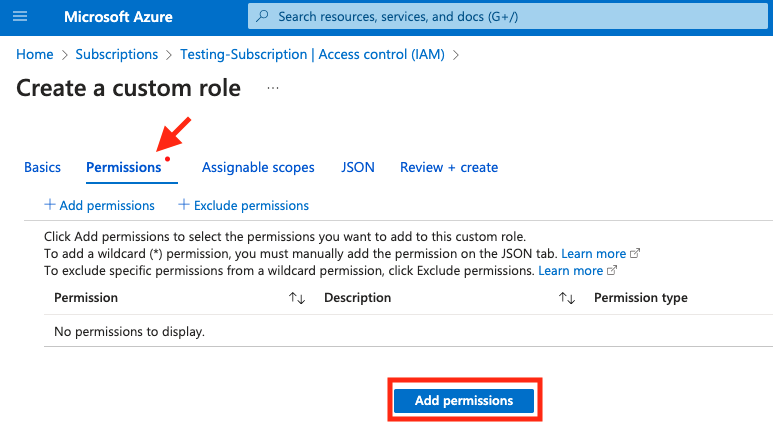
- Give a meaningful name to the custom role in the Custom role name field (e.g. 'secberus-role'). Optionally describe the role. Leave Baseline permissions set to Start from scratch. Select the Next button.
- In the Permissions tab, click Add permissions.
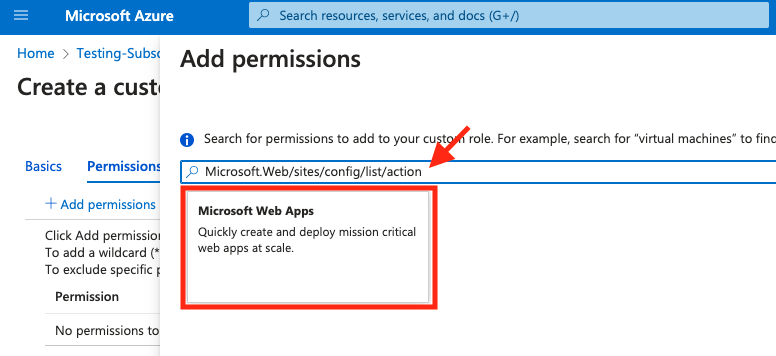
- Using the Search bar under Add permissions search for
Microsoft.Web/sites/config/list/actionand select Microsoft Web App.
- From the microsoft.web permissions screen select the Other : List Web App Security Sensitive Settings checkbox and click Add.
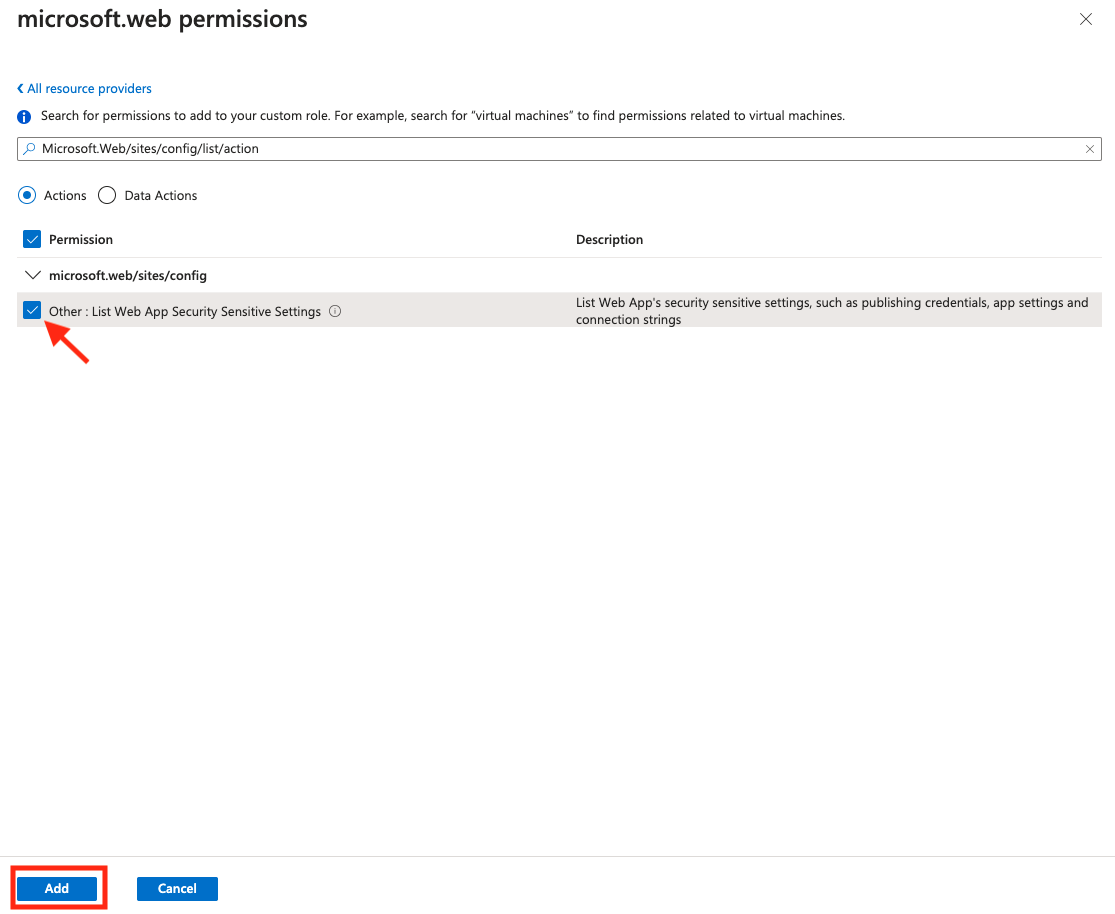
- Observe the permission has been added.
- Repeat steps 6-9 to add the following permissions:
- search for
Microsoft.Storage/storageAccounts/listkeys/action. From the Microsoft.Storage permissions screen select the Other : List Storage Account Keys. - search for
Microsoft.Storage/storageAccounts/queueServices/queues/getAcl/action. From the Microsoft.Storage permissions screen select the Other : Process message.
- search for
- With the permissions in place, select Review + create.
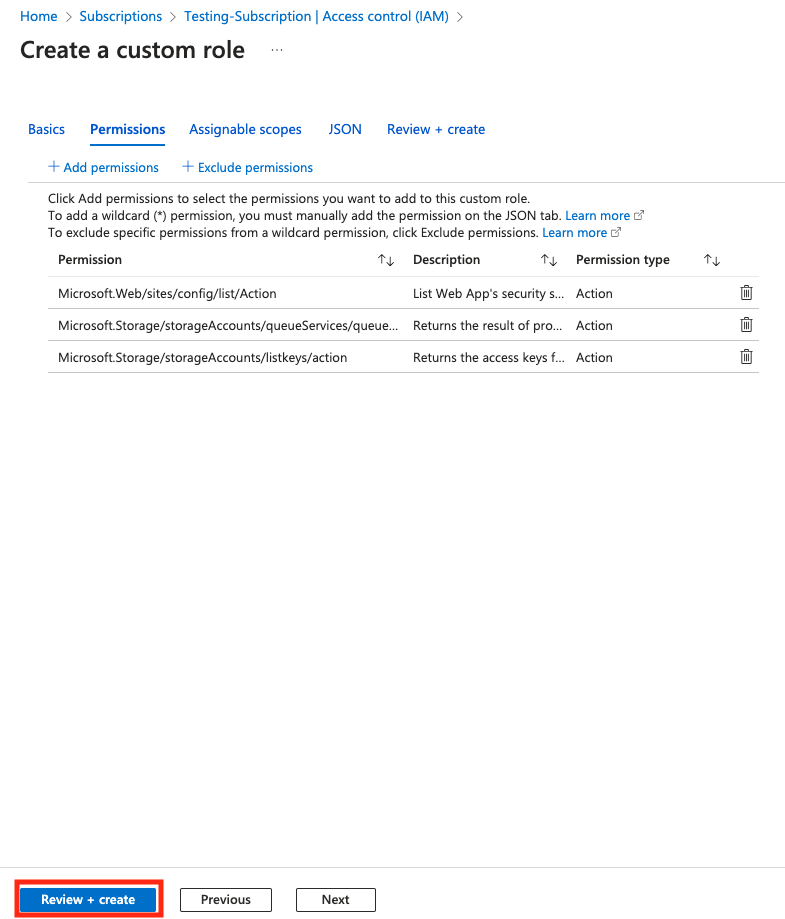
- From the Review + create screen choose Create
- Select OK to confirm the custom role has been created.
3. Assign roles to app registration
- From the Subscription screen select Access control (IAM).
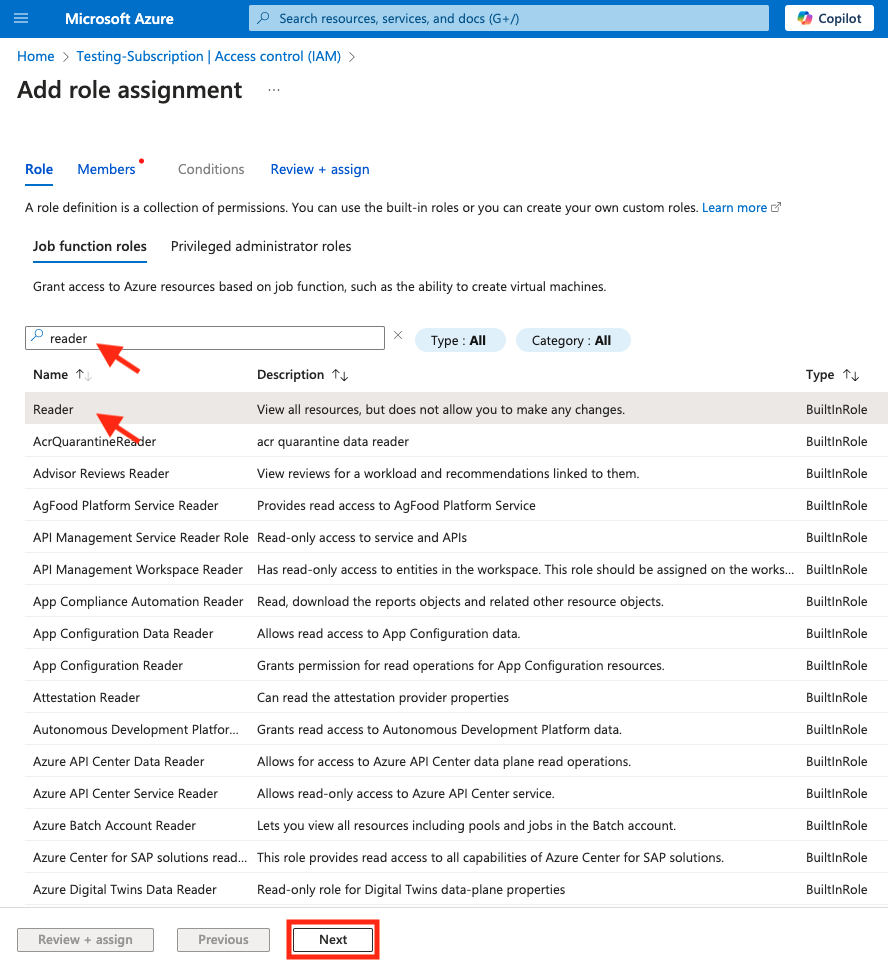
- Under the Subscription | Access control (IAM) screen select Add role assignment from Grant access to this resource.

- From the Add role assignment screen, under Job function roles, type
Readerin the search bar and select the Reader built in role (it will be highlighted in gray when selected). Click the Next button.
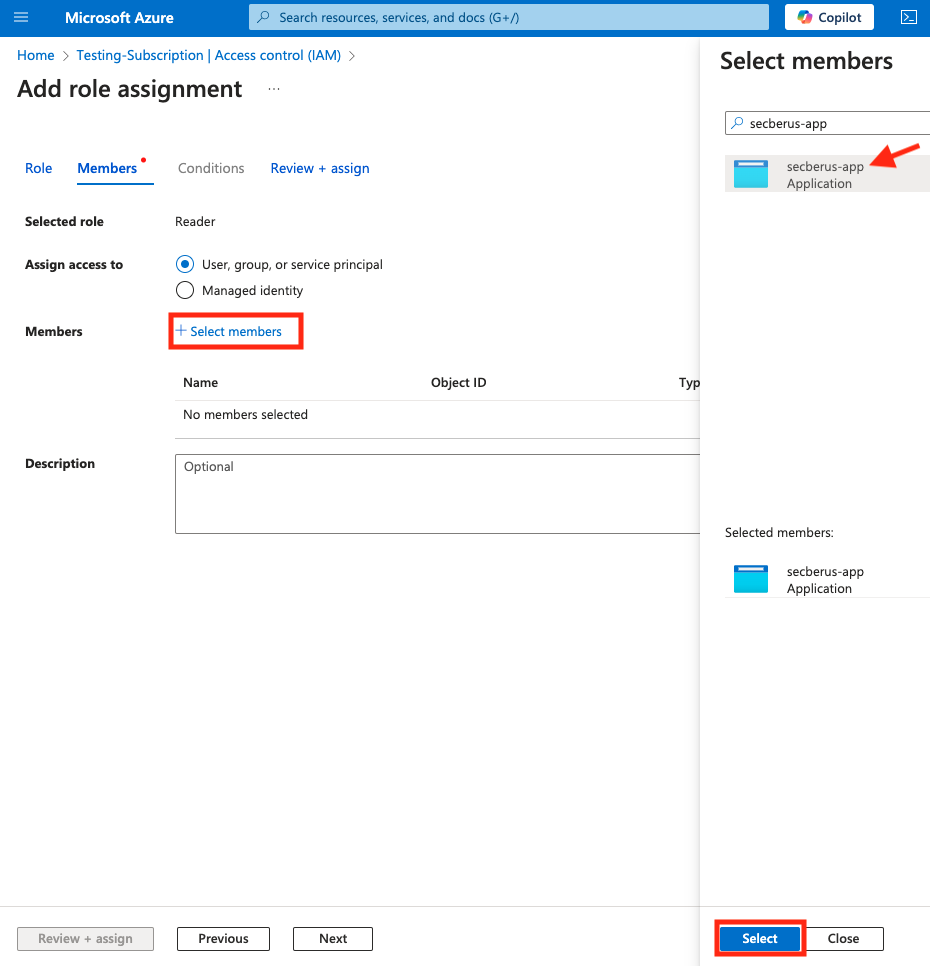
- Choose + Select members under the Members section of the Add role assignment screen.
- Use the Select field under the Select members section to search for the application created in step 1.
- Confirm the application is under Selected members and click Select.
- Confirm the application is listed under the Members tab on the Add role assignment screen and click Review + assign.
- Complete the assignment of the Reader role by clicking Review + assign.
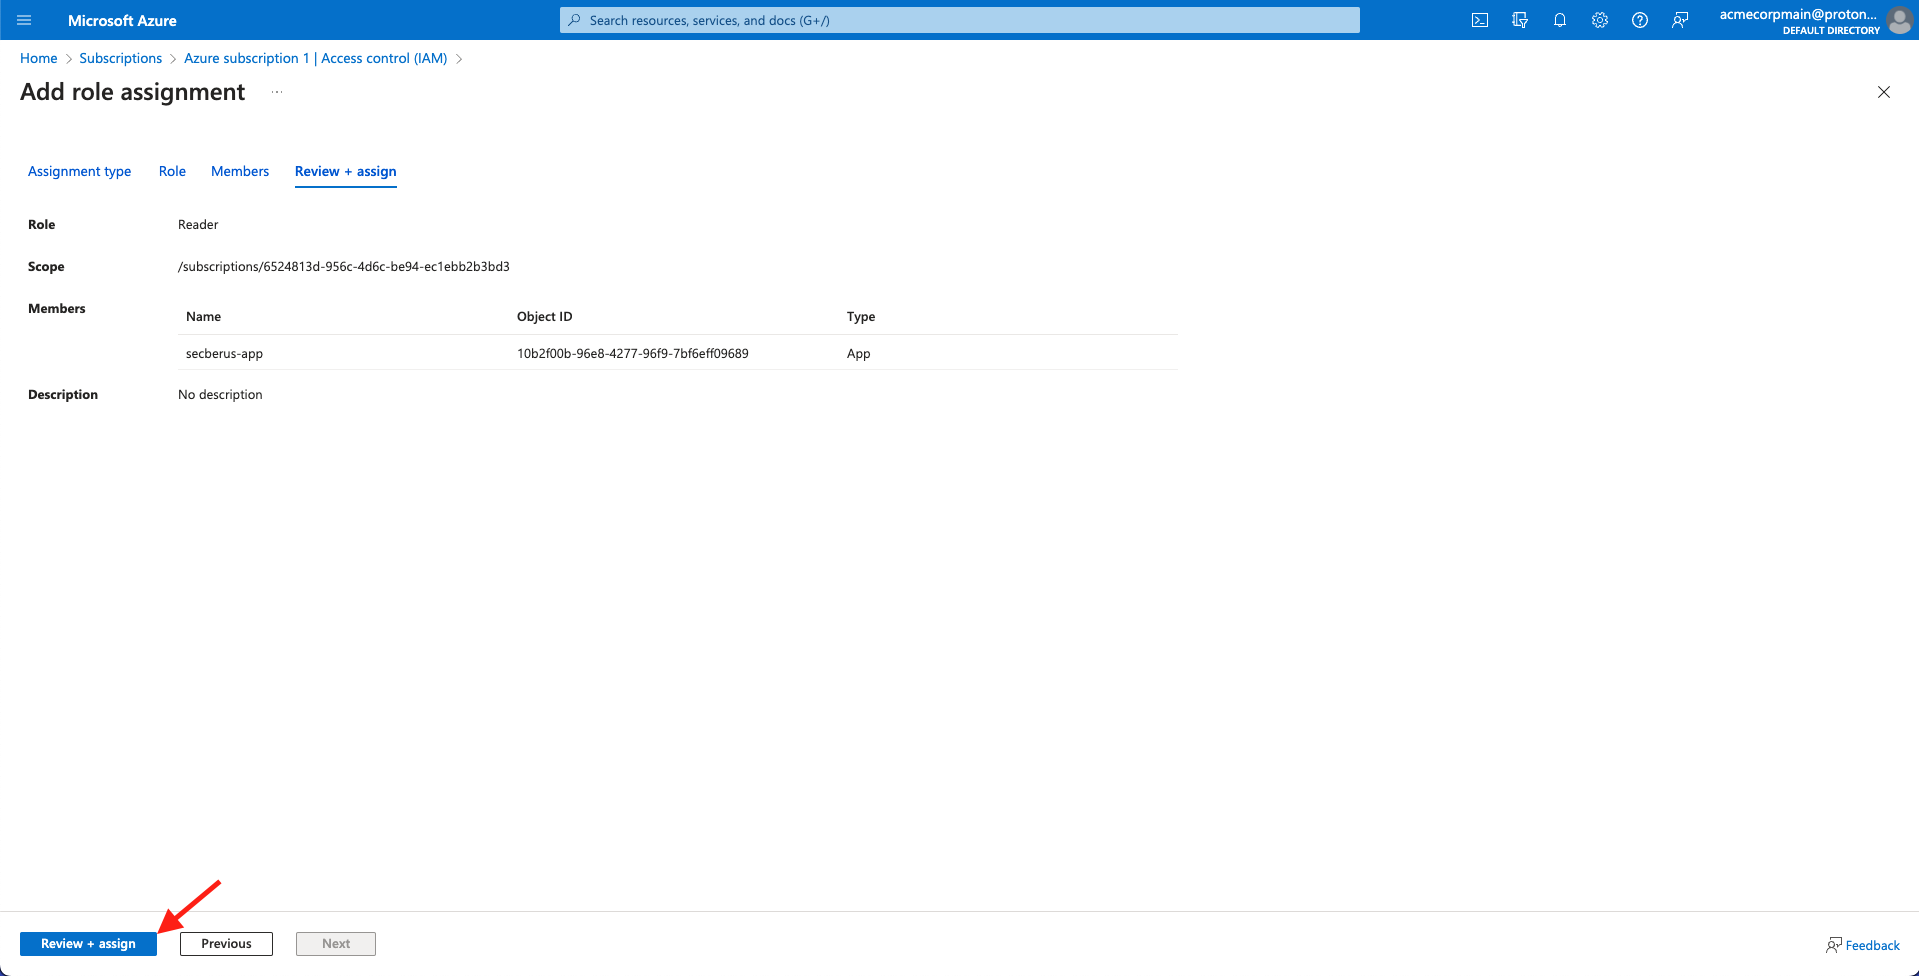
Click 'Review + assign' to complete the assignment
- Repeat steps 1-8 for the Key Vault Reader role.
- Repeat steps 1-8 for the Custom role you created earlier in step 2. (e.g. 'secberus-role').
- From the Subscription | Access control (IAM) select the Role assignments tab and confirm that your application has been assigned the three roles.
Add Azure subscription to Secberus
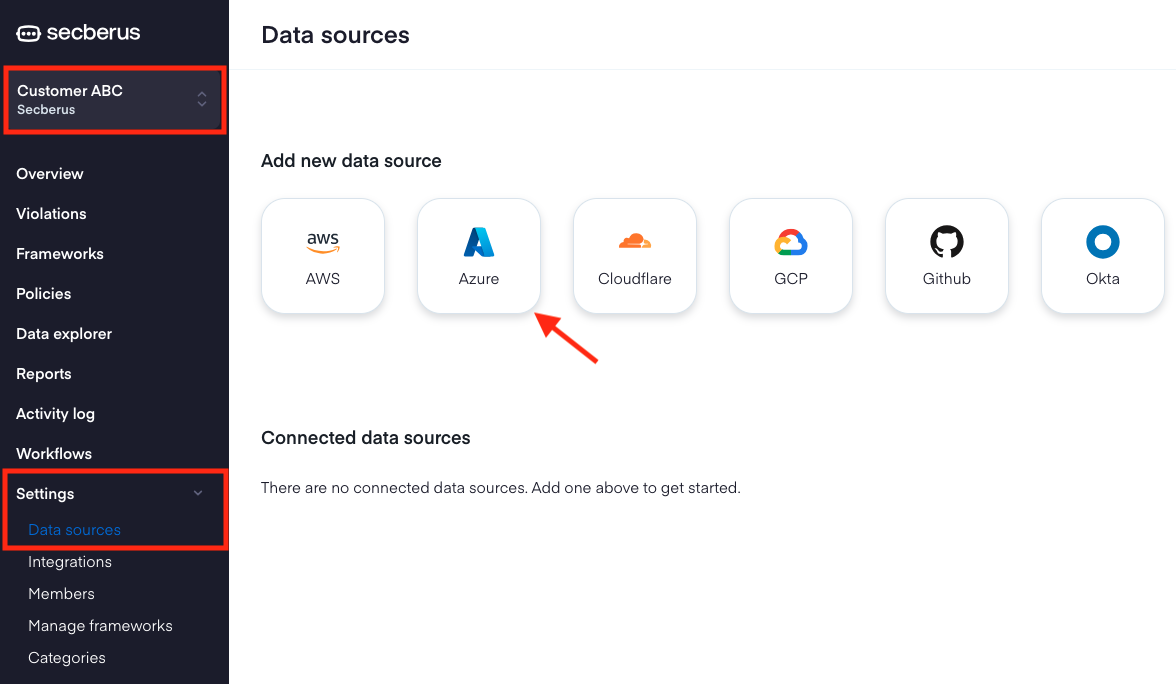
- Log into Secberus and select the org you want to create the datasource connection in.
- Click on Settings and then click on Data sources.
- Choose the Azure data source type in the Add new data source section.
- Populate the Name field in the Add Azure data source form.
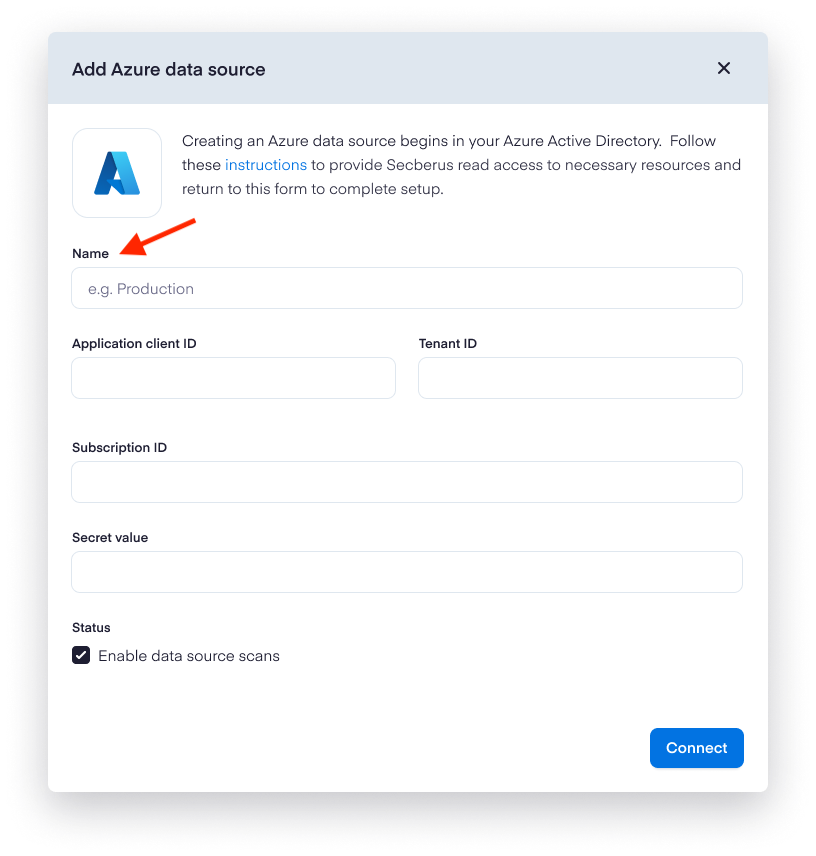
- You can get your Application Client ID and Tenant ID when viewing your app registration's overview page in the Azure portal.
- You can get the Subscription ID from the Subscriptions page in the Azure portal.
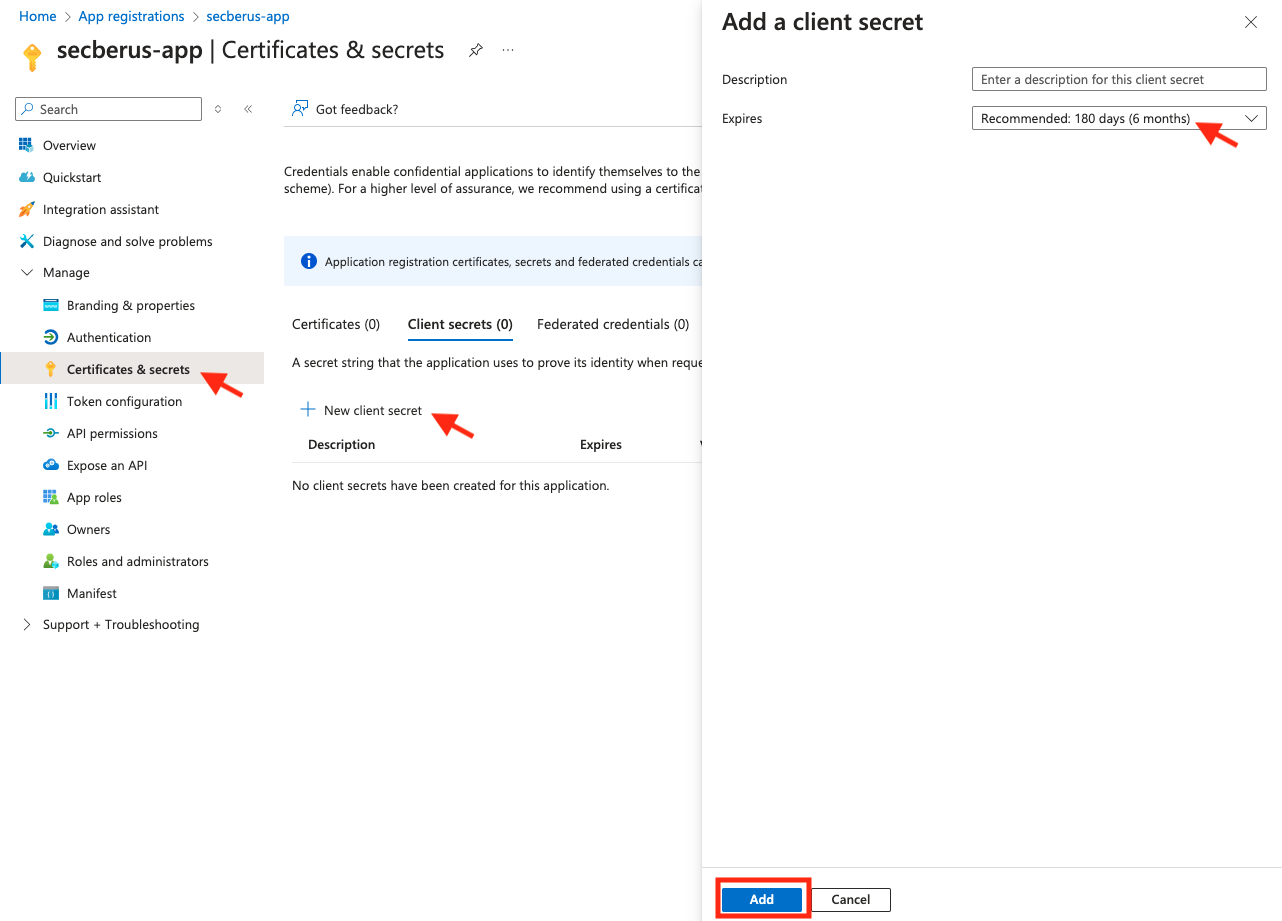
- For the Secret value, we need to create a new secret for your app registration. Return to the Secberus app screen in Azure, select Certificates & secrets, click New client secret, set an appropriate expiration date, finally click on Add.
- Copy the client secret Value (not the Secret ID).
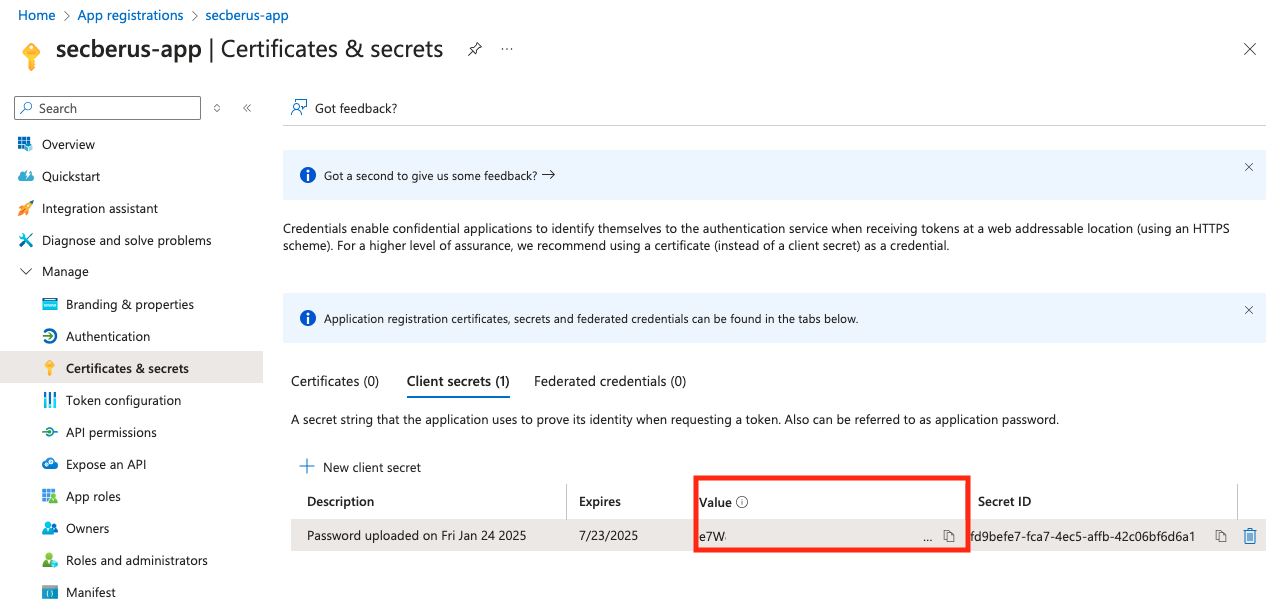
- Paste this value into the Secberus application Add Azure data source window under Secret value.
- Finally, set the desired status for enabling data source scans, and click Connect to verify your credentials and connect Secberus to your data source.
CONGRATULATIONS 🎉You successfully onboarded an Azure account. You can add more Azure accounts, onboard other cloud provider accounts, or apply a policy to this Azure account. Additionally, you can view the connection status once Secberus begins collecting resource data for evaluation.
Note: Permissions changes can take a 5-10 minutes to propagate in Azure.
Updated about 1 year ago